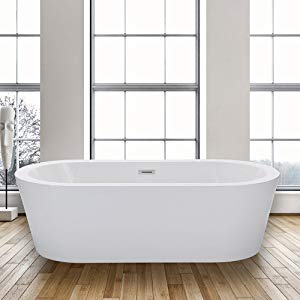
Acrylic is one of the most generally utilized materials for bathtubs. Acrylic tubs are warm to the touch, keeping up water temperature; lightweight, therefore simple to transport, handle and fit; accessible in a variety of hues and dependable. In any case, regardless of how tough a bathtub is, mishaps and harm can occur. If your bathtub builds up a split, it doesn't really mean it needs replacing, you may most likely set up the break yourself. Click the link you need to know about acrylic bathtub reviews.
1. End development and flexing to keep the crack from returning once you have fixed it. Drill 1/4-inch openings in a territory roughly 1-foot square around the break. Try not to bore entirely through to the other side of the tub. Addition protecting froth into the openings to avoid further flexing. Gradually trim away any abundance froth that spills from the gaps with an art knife, being mindful so as not to slice excessively near the outside of the tub. Sand staying abundance, utilizing 240-grade sandpaper.
2. Drill a gap at the two finishes of the crack, guaranteeing you get the break on each end. This keeps it from spreading further. Once more, drill gradually and cautiously to guarantee you don't bore through to the other side of the tub.
3. Blend a two-section polyester filler and apply along with the break, utilizing an elastic spreader. Guarantee the crack and the drill openings at the finishes are totally filled. Enable the filler to dry totally.
4. Sand the filler smooth so it's flush with the encompassing surface, beginning with an extremely fine 240-coarseness sandpaper and finishing with an ultra-fine 800-coarseness. Wipe the territory with denatured liquor to remove residue and debris.
5. Buy a bathtub set up paint from your neighborhood handyman shop. Guarantee to choose a good shading match. Shower a light coat onto the fixed zone, utilizing a splash weapon. Keep the splash firearm moving to make an even coat and counteract trickles and runs. Enable the paint to dry totally.
6. Keep on applying layers of paint until you have made a smooth finish that coordinates the remainder of the tub.
7. Apply an auto polish, urethane compound to the fix, utilizing a cradle and buff to make a hard finish and smooth the edges of the paint. This mixes the shading and the fix with the remainder of the tub.
Things You Will Need
Drill
Drill bit, 1/4-inch
Insulating froth
Two-part polyester filler
Rubber spreader
Sandpaper, 240-and 800-coarseness
Denatured liquor
Bathtub fix paint
Spray weapon
Auto polish urethane compound
Buffer
Fiberglass fix unit
Tips
Use a two-section, moment drying protecting froth to spare time. Work on utilizing the froth on a bit of paper to perceive the amount it extends.
Instead of obtaining the individual parts for your fix, put resources into a DIY fiberglass fix pack.
Paint shower weapons are accessible at most home improvement stores.
Warnings
If you don't penetrate gaps at each finish of the crack, it will keep on lengthening after you have fixed the existing harm.
If you inadvertently drill through the pit to the other side of the tub, the harm on that side should be fixed similarly as the first harm.