May you like the Best Recreational Vehicle Roofing Sealant Exhaust vents Visible fractures Unsealed edges and corners Wirings getting in the roofing system Antennas Around the exhaust fans and ac system The procedure is easy. All you need to do is to In this approach, you don't need to utilize a chemical cleaner, however then, it might not use throughout all roofing sealants.
You shouldn't disrupt the RV roofing system to prevent a bigger issue, such as harming the other parts of the roofing system. In addition, some owners likewise utilize a hair drier in removing a rubber roofing sealant, which is quite useful and simple if you're dealing with cold weather condition. On the other hand, you can likewise refer to the item handbook that features the sealant that you purchased.
Some of them recommend using a putty knife that can eliminate the roofing sealant. Others can suggest using a heat gun to take it out. You can think about any of these easy approaches to get rid of the set and dried sealant, particularly if you need to reapply the sealant or you have actually made an error.
It can also seal around the edges and corners so that they stay watertight. Using a sealant, you can also keep your Recreational Vehicle cool and dry on any weather. However, you may in some cases have to get rid of the old rubber roofing covering since you need to reapply a brand-new one or fix some application mistakes.
Sta-kool Elastomeric White Reflective Roof
With it, you can apply a brand-new one to continue gaining its benefits, such as avoiding water damage, saving cash and avoiding big repair work. All these can also extend your RV's life-span and promote the comfort of everybody aboard your vehicle.
How To Apply Elastomeric Paint (With Pictures)
( This post might contain affiliate links. For more details see our Privacy page.) My RV roof that requires to be replaced! Welcome to my RV Remodelling Series!.?.!! So you want a RV but can't afford one. If you're like me and have more time than money, then maybe your finest choice is to purchase an old Recreational Vehicle and repair it up.
All old Recreational Vehicle's do! Time to consider an! I understand, a RV roofing system replacement can look like an impossibly uphill struggle. I get it. I bought my RV over a year ago and didn't have the guts to start tackling this job until today. But I'm here to inform you, if I can do it, you can do it.
It has only 55,000 miles and all the devices work and I love the layout. The catch? Water damage! I've never ever dealt with a Recreational Vehicle before and I have to confess, I'm afraid. I've done a great deal of home improvement and I'm still terrified. That's because this is all brand-new to me and I have no concept what to anticipate.
Jetcoat Cool King Reflective Acrylic Roof Coating, Waterproof
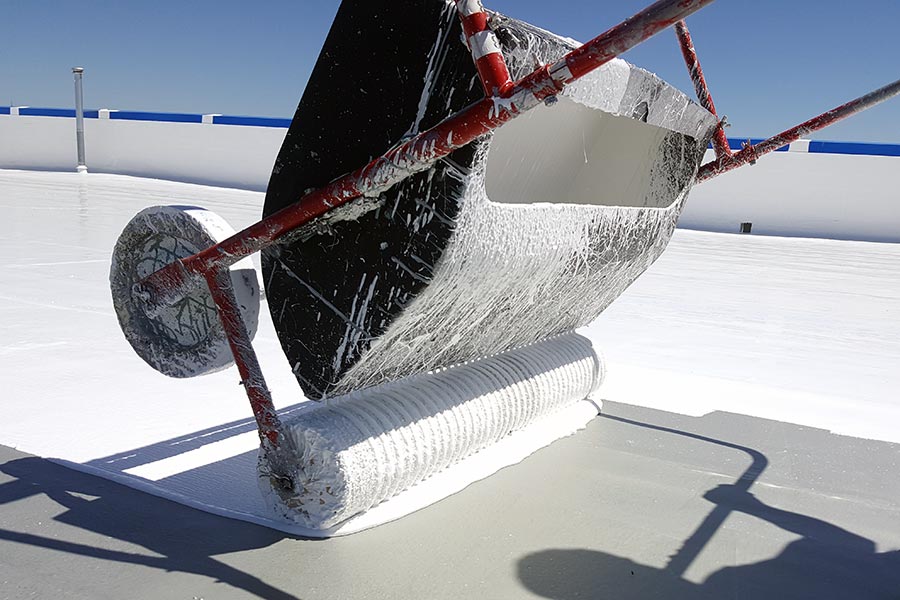
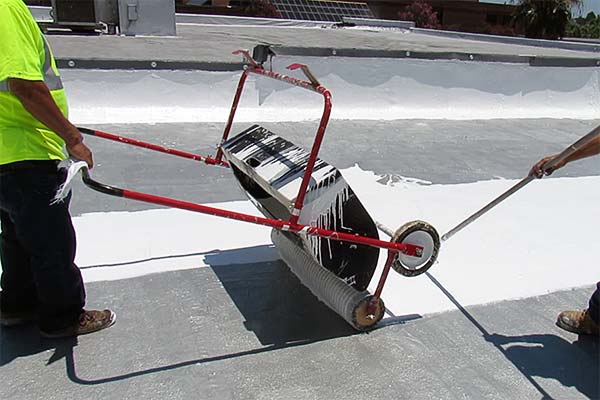
How To Apply Elastomeric Cool Roof Coatings: 3 Easy Steps
So my initial step (that I really did numerous months back when I purchased the camper) was making a shelter so I might work without rain gathering. I bought a 12 x 26 SuperMax Canopy by ShelterLogic (over 0 on Amazon however I purchased mine from Northern Tool for about 0!) and jacked up the legs with wood extensions to make the canopy high enough that I could stand on the roof and walk underneath it.
It appears like there are no canopies offered that are tall sufficient to function as a RV carport. You could buy an actual metal roofing Recreational Vehicle carport but those are way more costly, normally 00 and up! Also these don't normally have adequate clearance above for you to work on the roofing system.
I calculated the expense of doing it that way (wood framing) and it came out to a similar cost as purchasing this canopy. I figured I would rather have it semi-portable so I went with the canopy, plus this allows me to change the height up and down when I require to.
Ultimately those bent during a wind storm. Then I sawed 1 1/4 square legs from 24's to put inside the canopy legs (again holding the canopy up with pipeline clamps.) and reinforcing the four corners with an additional 24 screwed to it. This is still a little floppy. I most likely ought to have handed over for some rigid steel pipe from the start.
Elastomeric Roof Coatings For Leaks Repair And Maintenace
Simply make sure to stake the corners down with rope if you have any wind! I raised a 12 x 26 canopy to cover my work location. Time to go up and take a look at a few of the issue areas on my old EPDM roofing system. EPDM is the most common kind of rubber roofing found on campers.
Fractures in the EPDM roofing at edge of camper. An old spot task on the Recreational Vehicle rubber roof. Loads of caulk stacked over old problem locations. As you can see, this roofing system has actually had a lot of concerns throughout the years. Looking from the inside of the camper there have actually clearly been leaks in many locations of the roofing.
I grabbed an energy knife and began slicing. The first thing I noticed is that there were two layers. On the bottom is the initial EPDM rubber roof layer. I know it's EPDM rubber and not TPO rubber because of the black support. (TPO roof is white on both sides.) On top of my EPDM roofing is a thin Recreational Vehicle roofing system covering that was used later on.
I just left the roofing system coating stayed with the EPDM roof and pulled them up together. (You do not require to peel them up separately.) Beginning to peel off roofing system finishing. Peeling up area of the bottom layer of rubber. This reveals that the original Recreational Vehicle roofing was EPDM since of the black backing.
I cut lines with an energy knife around fixtures. All rubber roofing eliminated from camper. This step went pretty rapidly. There was an adhesive under the bottom layer of rubber that was still quite well stuck in lots of locations, however with a good little bit of force it peeled up easily.