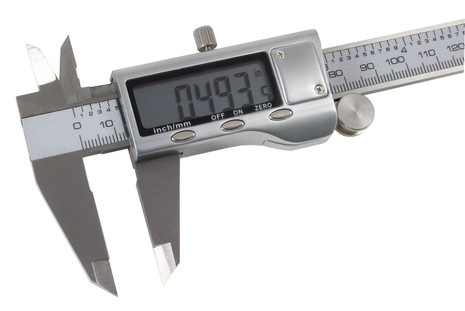
How to Use and Understand Digital Calipers Correctly? Digital calipers - additionally called Electronic Calipers. The digital calipers accompany no line graduated estimating scale. They have two upper jaws and two lower jaws. Among which, there are a mobile lower jaw and a versatile upper jaw. They comprise three catches on the defensive sticker, the ON/OFF, ZERO and MM/IN score. Also, there is a locking screw over the defensive label.
 The perusing is electronically created and digitally shown on a substantial LCD show. Digital calipers can give simple, quick, mistake-free estimation, in addition to SPC (Statistical Process Control) examination and documentation. For the most part, a standard 1.5-volt silver-oxide catch battery is utilized for the digital calipers, and they can make the grade regarding 3, 4, 6, 8, 10, 12 or significantly more inches. The perusing is electronically created and digitally shown on a substantial LCD show. Digital calipers can give simple, quick, mistake-free estimation, in addition to SPC (Statistical Process Control) examination and documentation. For the most part, a standard 1.5-volt silver-oxide catch battery is utilized for the digital calipers, and they can make the grade regarding 3, 4, 6, 8, 10, 12 or significantly more inches.
Contrasted and the standard caliper composes, there are four noteworthy exceptional points of interest of the Hornady digital calipers as takes after:
- the estimation is perused in a single advance, to be specific, the digits can be read quickly from a large LCD digital readout specifically and advantageously.
- It can be zero-setting at any situation for incremental estimations, and inch estimations are shown to inside .0005 in. What's more, metric to inside 0.01 mm.
- a catch licenses you to pick inch or metric estimation rapidly.
- Information can be the contribution to your exceptional printer or PC for handling and printing through the serial (RS-232) or Universal Serial Bus (USB) port in the back of them. The short guide as underneath will show how to utilize and read the standard digital calipers effectively.
Arrangement
Step1: Dry and clean the estimating surface of the protest which you will quantify with clean fabric (or drenched with cleansing oil);
Step2: Dry and clean the covering of the cover with clean fabric (or drenched with refining oil);
Step3: Loosen the locking fastener of the digital caliper.
Step4: Dry and clean the lower jaw on the correct side of the digital calipers with clean fabric (or drenched with cleaning oil);
Step5: Dry and clean the lower jaw on the left half of the digital calipers with a clean material (or doused with cleaning oil);
Step6: Dry and clean the upper jaw on the correct side of the digital calipers with clean fabric (or doused with cleaning oil);
Step7: Dry and clean the upper jaw on the left half of the digital calipers with clean fabric (or doused with cleaning oil);
Step8: After that, completely shut the digital caliper and turn on the ON/OF catch. If the perusing is 0, at that point, you can begin to take an estimation. If there are holes between the jaws, clean the jaws until there are no holes.
Step9: Move the slider to check if the LCD show and every one of the catches performs well.
Taking the Measurements
When you take the estimation, don't touch the estimating surface of the question be estimated and the estimating surfaces of the digital calipers with your hands for it may bring about mistake because of the sweat staring you in the face. You have to keep them clean always.
Before estimating the items, right off the bat, you have to press the ON/OF catch to switch on control. Furthermore, press the mm/inch catch to choose the coveted unit framework as you like. (Here we pick the mm form.) At long last, press the ZERO catches to set zero.
Ordinarily, the standard digital calipers can take the outside, inside, advance and profundity estimations.
Taking the outside estimations:
Step1: Set the lower jaws of the digital caliper outwardly parts of the thing.
Step2: Slide it against the thing delicately until the point when both of the lower jaws fix against the outside surfaces of the thing consummately.
Step3: Then read the numbers straightforwardly from the substantial LCD show. For instance, it is 47.52 mm in the photo as beneath. The outside estimation is taken effortlessly.
Taking within estimations:
The way of choosing within estimate is like the outside estimation. Be that as it may, just the upper jaws of the digital caliper can deal with this.
Step1: As you can find in the photo underneath, when measuring within distance across of the question, right off the bat, you have to embed the upper jaws into the opening.
Step2: Then open them up to fit the gap entirely.
Step3: Then, read the number accurately. For this thing, the width is 24.84 mm.
Taking the progression estimations:
Do remember that when you make the stride estimation, the protest must be put on the hard and level plane.
Step1: Place the leader of the digital caliper on the plane straightly and ensure that the progression estimating face is opposite to the plane.
Step2: Make the progression estimating face of the upper mobile jaw touch the best surface of the protest totally, and after that, the estimation is finished.
Step3: Apparently, the perusing is 18.70 mm of step estimation in the photo.
Taking the profundity estimations:
There is a profundity bar which is mainly utilized for profundity estimation on the digital caliper.
Step1: Depart the slider of the digital caliper and modify the profundity bar opposite to both the hard, level plane and the inside side of the thing.
Step2: After that, depart the slider until the point that the base of the settled scale touches the best surface of the thing firmly.
Step3: Then read the number on the LCD show straightforwardly (e.g., the perusing is 14.44 in the photo).
Support Instructions
a) Never apply the voltage (e.g., etching with an electric pen) on any piece of the Digital Caliper because of a paranoid fear of harming the circuit.
b) Press the ON/OFF catch to close the power when the caliper stands sit without moving; take out the battery if it stands to sit still for quite a while.
c) As for the battery, anomalous show (digit blazing or even no-show) demonstrates a level battery. Along these lines, you should push the battery cover as the bolt coordinating and after that supplant with another one. If the battery purchased from showcase doesn't function admirably (the power may wear out because of the long haul stockpiling or the battery's programmed release, and so forth.), kindly don't delay to contact the provider.
d) Flashing show demonstrates dead battery. If this is the situation, please supplant the battery without a moment's delay. No, uproot confirms poor contact of a battery or short out of the two posts of the battery. If water enters the battery cover, open the lid promptly and blow within the battery cover at a temperature of close to 40°C till it gets dry.
About This Author | Roy Rogers
Hi, I am Rogers. I am a freelancer and blogger. Love to read
Joined: April 2nd, 2018
|
|